
Have you ever stared at fabric in your stash and wondered… Will this actually work in my quilt?
With Quiltster, you can upload photos of your own fabric stash and instantly see how it looks inside your quilt pattern. No guessing. No cutting regrets. Just confident, beautiful planning.
These quick instructions will show you how to upload your own fabrics so you can design with what you already own.
Pro Tip: Take good pictures of fabric at your local quilt shop to test in a project before you buy.
Before You Get Started
Take just a few minutes to prep your images:
-
Take a photo of your fabric
Lay it flat and make sure the design is straight. Tip: Hanging the fabric on a wall helps reduce shadows compared to photographing it on a table. -
Capture a true swatch size (for example, 8″ x 8″) of fabric only
-
Crop your photo into a square
-
Save the image to your computer
Want help taking great fabric photos or finding images online?
Click HERE for tips and examples
How to Upload Your Fabric
-
Go to Quilt Planner
-
Click Quilting Fabric
-
In the left filters, choose Mine
-
Click Upload New Fabric

A new window will open.
-
Click Browse and select your image
-
Enter a SKU
(This is just for you — it can be the manufacturer SKU or any name you want.) -
Enter the Swatch Size
This controls the scale of the fabric in your quilt.-
Enter the actual size of the fabric shown in your photo
-
Example: If your image shows an 8″ x 8″ square, type 8
-
Use only numbers (whole or decimal)
-
-
Click Upload
That’s it!

Now it’s your turn! Visit Quilting Fabric and upload your first fabric now!
Helpful Hints about Uploading Fabric
Why Swatch Size Matters
Swatch size tells Quiltster how big the fabric design should appear in your quilt.
If the swatch size is too small or too large, the fabric print will look out of scale, even though the image itself looks fine.
For the most realistic preview, always enter the actual size of the fabric shown in your photo.
For example:
If your photo shows an 8″ × 8″ piece of fabric, enter 8 as the swatch size.
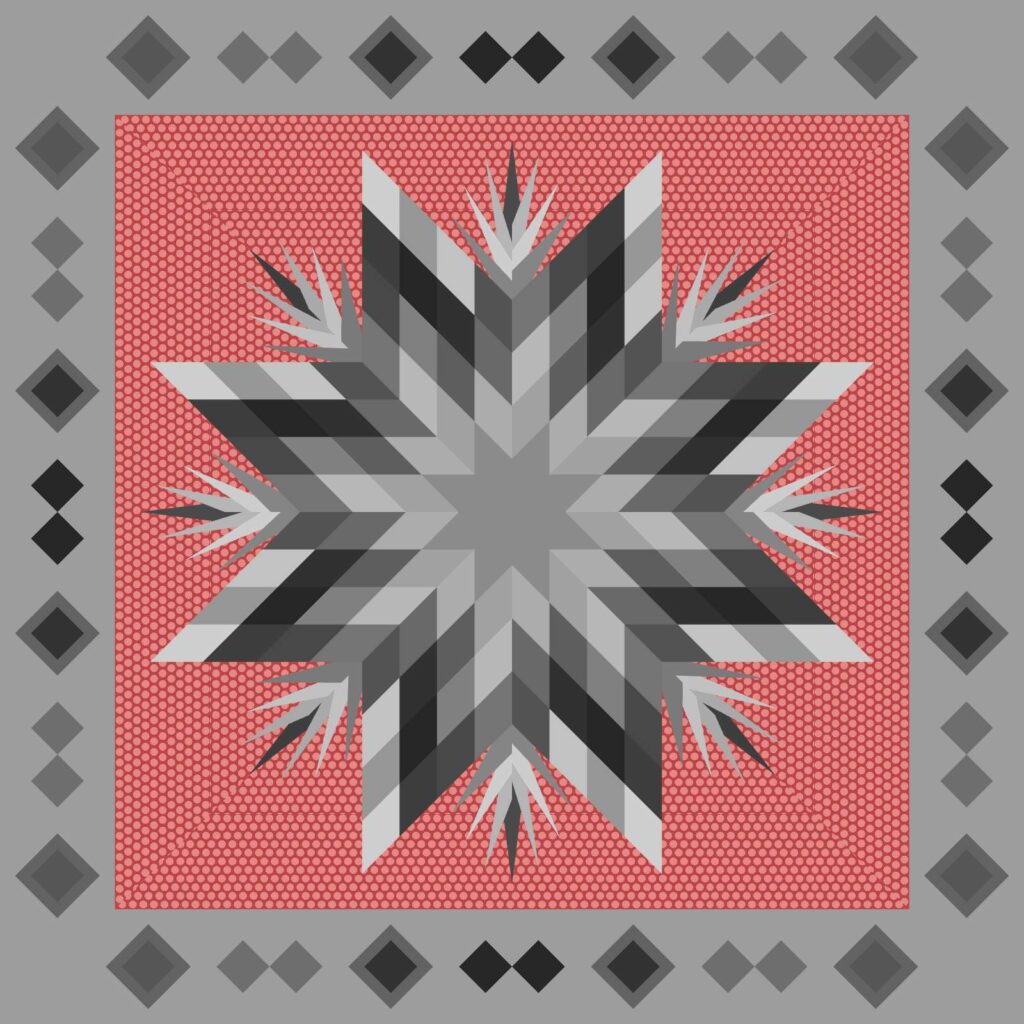
Correct Swatch Size
The fabric print looks natural and proportional inside the quilt blocks, giving you a true preview of how your quilt will look when it’s finished. The scale feels “just right,” so you can confidently choose colors and prints without second-guessing.
In this example, we used an 8 inch by 8 inch swatch. (entered as “8”)
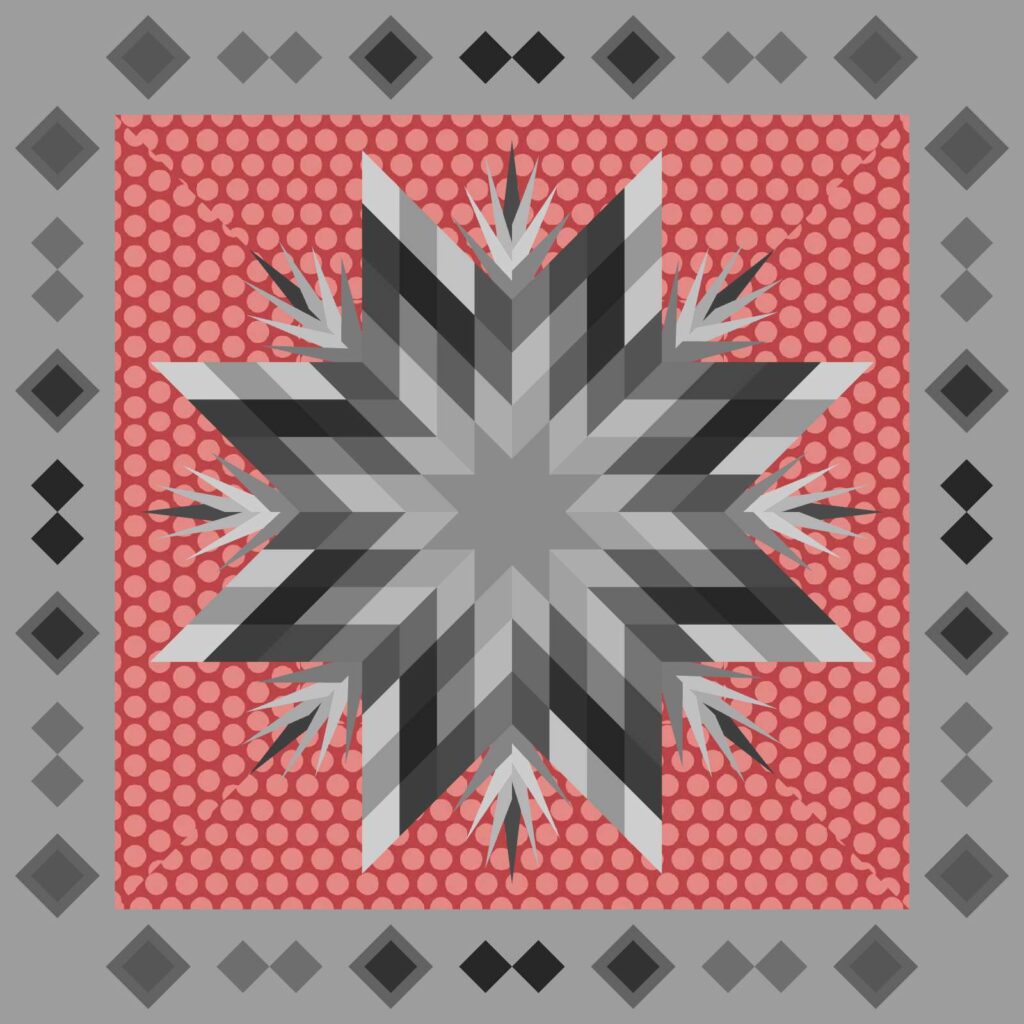
Incorrect Swatch Size
The fabric print appears overly large or tiny, which throws off the design and can make your quilt preview misleading.
In this example, the swatch size was entered as 20 inches for an 8 inch swatch. Here we see the design is too large and inaccurately depicts the design on the fabric.
Video Tutorial Showing How to Upload Fabric
Here’s a video walkthrough to guide you through the process. Please note that this tutorial was recorded on a previous version of our platform, so you may notice a few visual differences compared to what you see on the website today. The project steps and actions are still the same.
For the most up-to-date screens and labels, refer to the written guide in this post.
A few quick terminology updates:
- What’s shown as Fabric Stash in the video is now called Quilting Fabric.
- What’s shown as Pattern Library in the video is now called Quilt Patterns.