Congrats! You’ve reached the last step of creating your project!
Let’s walk through how saving works inside the Quilt Planner and what to look for before stepping away from your computer when customizing projects.
The good news: You don’t have to constantly worry about saving your work!
Quiltster automatically saves your changes as you design so you can focus on fabric and color, not buttons and backups.
Here’s how saving works (and what you need to know).
My First Quiltster Project
This is step 5 of 5 in learning how to create a project in Quiltster. Follow along the entire My First Quiltster Project series and watch your dream quilt come to life.
- Choose a Pattern
- Choose a Template
- Identify & Activate Blocks
- Add Fabric
- Save Project ← You are here
Bonus Step: How to Share Your Project
Quick Start Steps
- When adding fabric inside the Block Editor, click Save & Close to save your changes.
- Once back on the main Quilt Planner page, wait for the save spinner to stop spinning (bottom left corner) before exiting the Quilt Planner.
Continue below to learn a little more about how saving works.
Save As You Go (Automatic)
As you customize your quilt, your project automatically saves in the background.
When you’re adding fabric inside the Block Editor, you’ll use Save & Close when you’re finished with that block group.
What this does:
- Saves the changes made to that block
- Returns you to the main Quilt Planner page
- Triggers a save confirmation

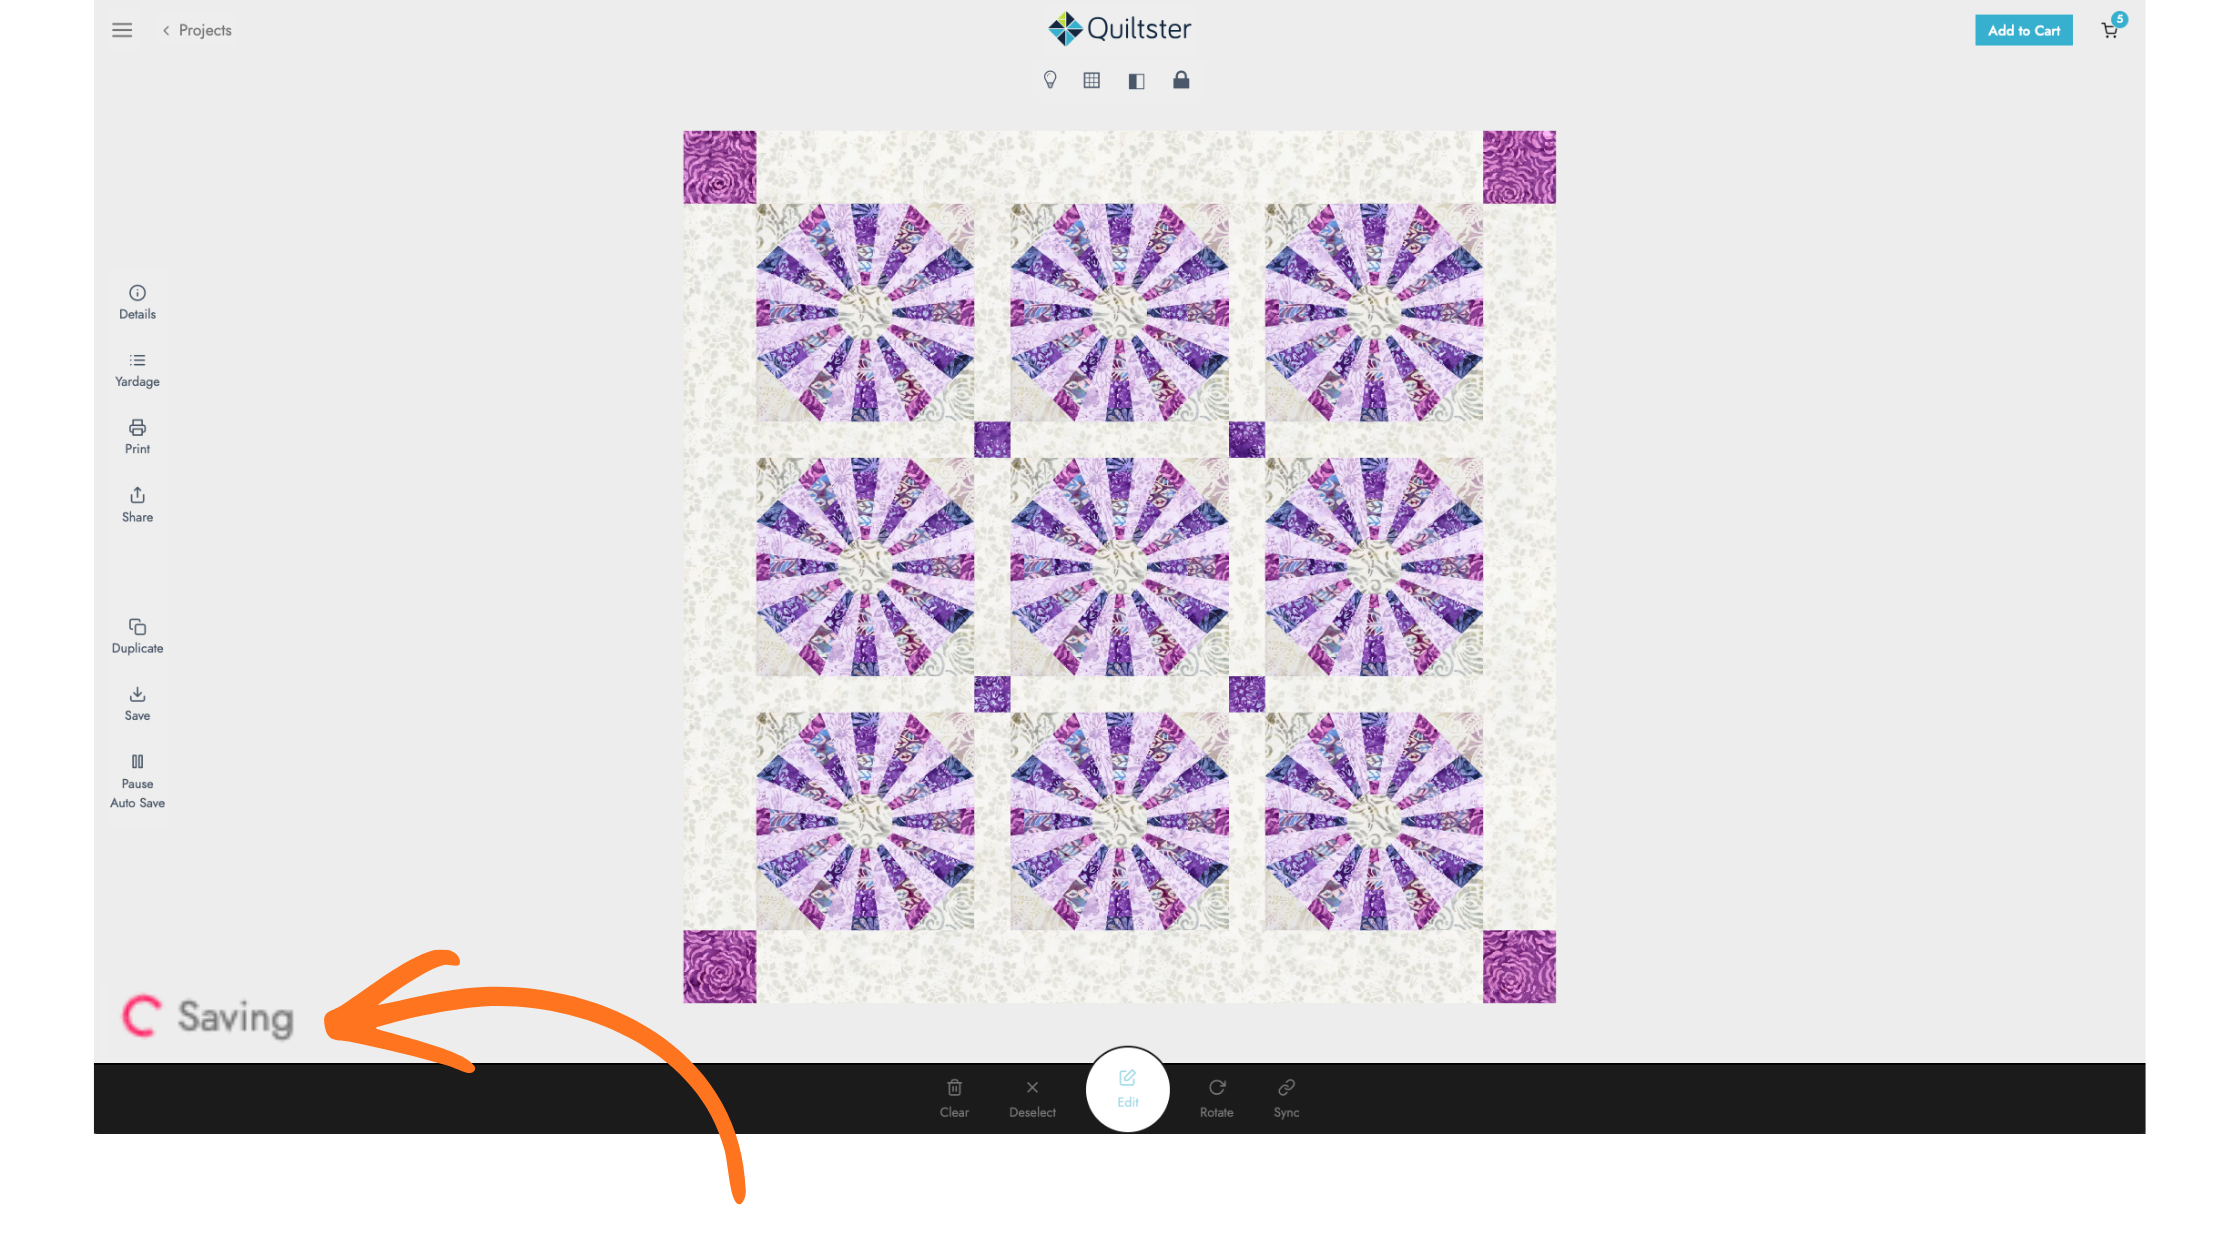
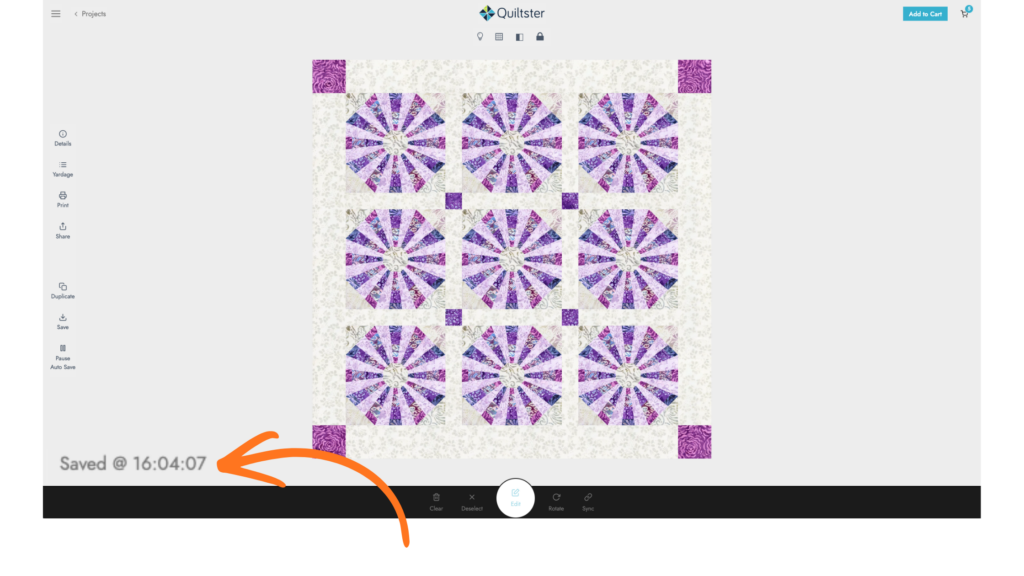
On the main Quilt Planner page, look to the bottom left corner of the screen:
- You’ll see a spinner while the project finalizes saving
- Once complete, you’ll see a timestamp confirming the save
That timestamp is your confirmation that everything is fully updated.

The Save Button (Manual Backup)
Even though Auto-Save is active by default, you can manually click Save anytime as a backup before leaving. Once the timestamp appears in the corner, your save has completed.
It’s not required, but it’s there if it gives you peace of mind.
Think of it as a “just in case” button.
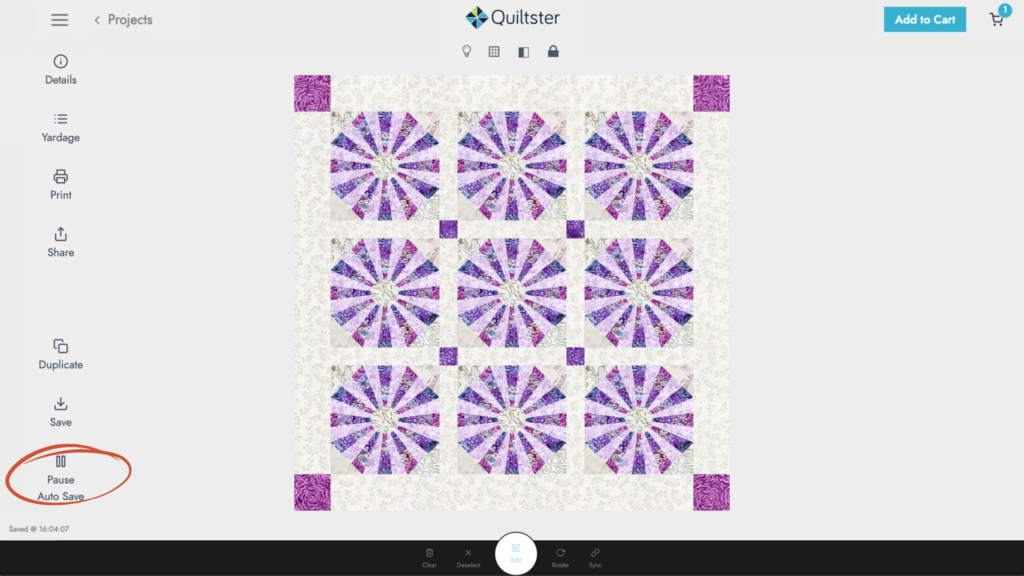
The Auto-Save Button (Advanced Option)
By default, Auto-Save is turned on.
If you click Auto-Save, it turns automatic saving OFF which means:
- You MUST manually click Save as you work or it will not be saved.
- If you forget, your changes may not be stored correctly.
Why would you turn Auto-Save off?
Some large or complex quilt designs take longer to process when saving.
If you’re:
- Working on a very detailed quilt
- Moving frequently between the Block Editor and Quilt Planner
- Noticing slight delays while editing
Turning off Auto-Save can speed up the editing experience. You simply save when you’re ready.
It gives you more control but also more responsibility.
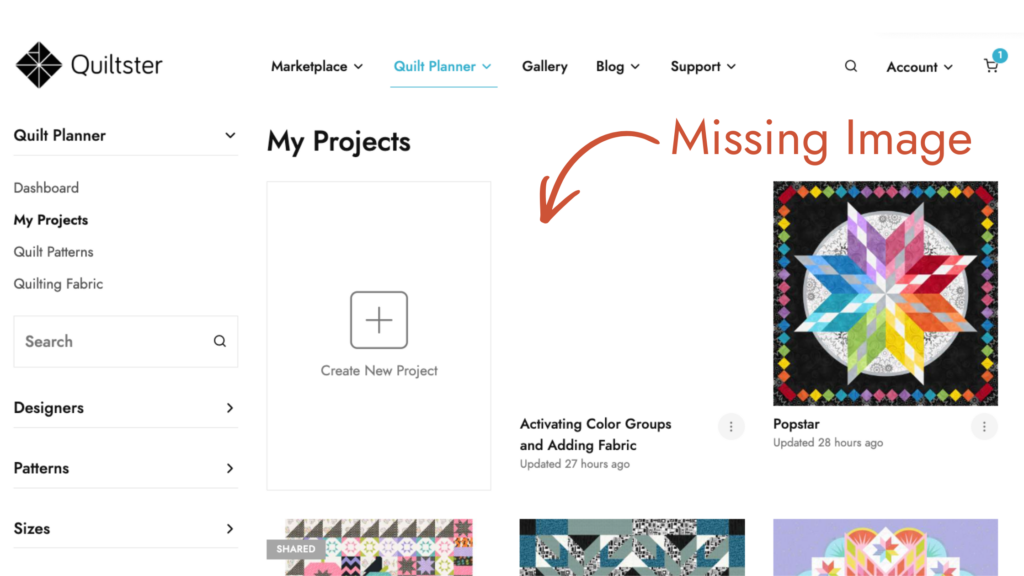
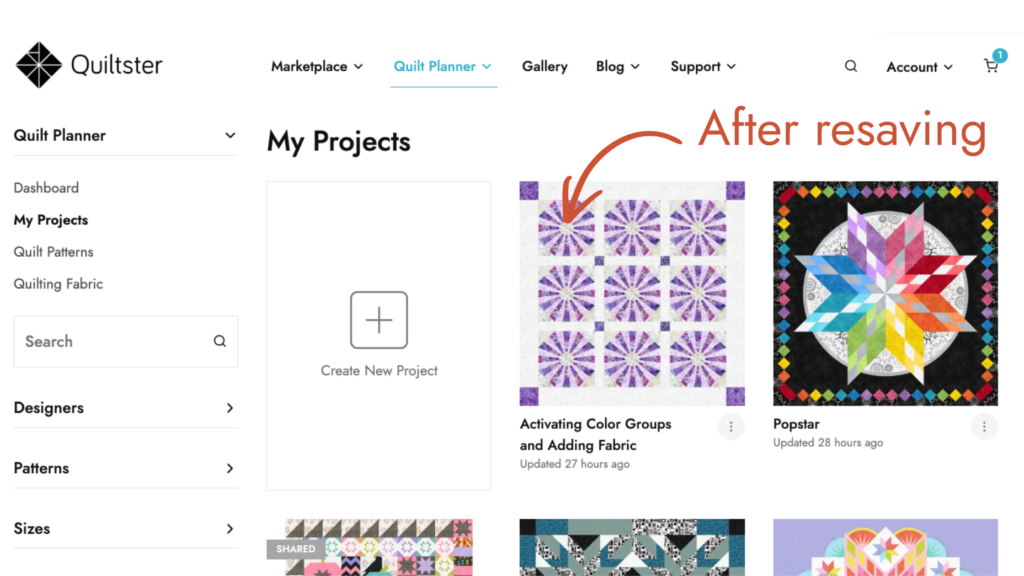
Leaving the Quilt Planner Too Quickly
When your project is auto-saving, if you leave the Quilt Planner page before the timestamp appears (for example, by going to your Dashboard, My Projects, or the Marketplace), your project will still save but…
Sometimes the preview images may not fully generate.
If that happens:
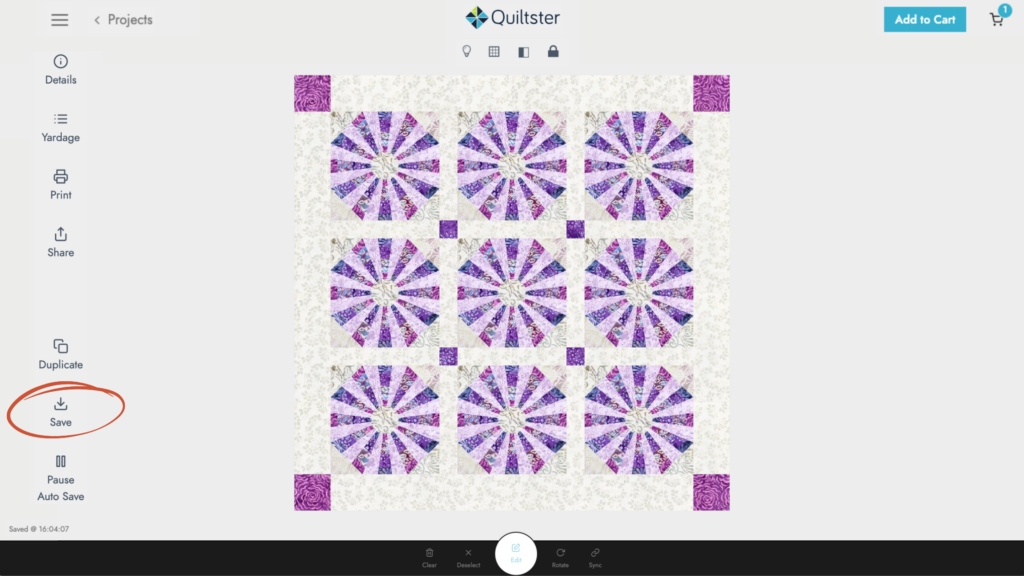
- Reopen your project
- Manually click the Save button on the left-side action panel
(You’ll see: Details, Yardage, Print, Share, Duplicate, Save, Auto-Save) - Wait for the timestamp to complete
- Then you’re safe to leave
And all will be well 😊
Quick Summary
- Quiltster automatically saves your work by default.
- Use Save & Close inside the Block Editor.
- Watch for the timestamp to confirm saving.
- Use Save manually anytime if you’d like.
- Only turn off Auto-Save if you’re comfortable managing manual saves.
Design freely. Quiltster is working in the background so you don’t have to worry.
Happy Quiltstering
What’s Next?
Congratulations! You’ve completed creating your first Quiltster project! Now let’s continue with the next step in the My First Quiltster Project series and learn how to share your beautiful work.
- Choose a Pattern
- Choose a Template
- Identify & Activate Blocks
- Add Fabric
- Save Project
Bonus Step: How to Share Your Project ← Up next