
You made it! 🎉 Let’s have some fun!
You’ve chosen your pattern, selected your template, activated your block groups, and clicked Edit which brings you into the Block Editor.
In this step, we’ll walk you through how to add fabric to your project and how to navigate the Block Editor section of the Quilt Planner.
My First Quiltster Project
This is step 4 of 5 in learning how to create a project in Quiltster. Follow along the entire My First Quiltster Project series and watch your dream quilt come to life.
- Choose a Pattern
- Choose a Template
- Identify & Activate Blocks
- Add Fabric ← You are here
- Save Project
Bonus Step: How to Share Your Project
Quick Start Steps
If you just want the short version, here it is:
- Click a space in your block to activate a color group
- Under All Fabrics, use filters or search to find a fabric you like
- Click a fabric swatch and watch it load instantly into your project
- Repeat until every space in the block is filled with fabric
- Click Save & Close to exit the Block Editor and go back to the main Quilt Planner Page
For a detailed step-by-step guide, continue with the instructions below.
A Tour Around the Block Editor
Let’s quickly familiarize ourselves with the Block Editor section of the Quilt Planner.
On one side you will see your project.
On the other side you will see the fabric panel.
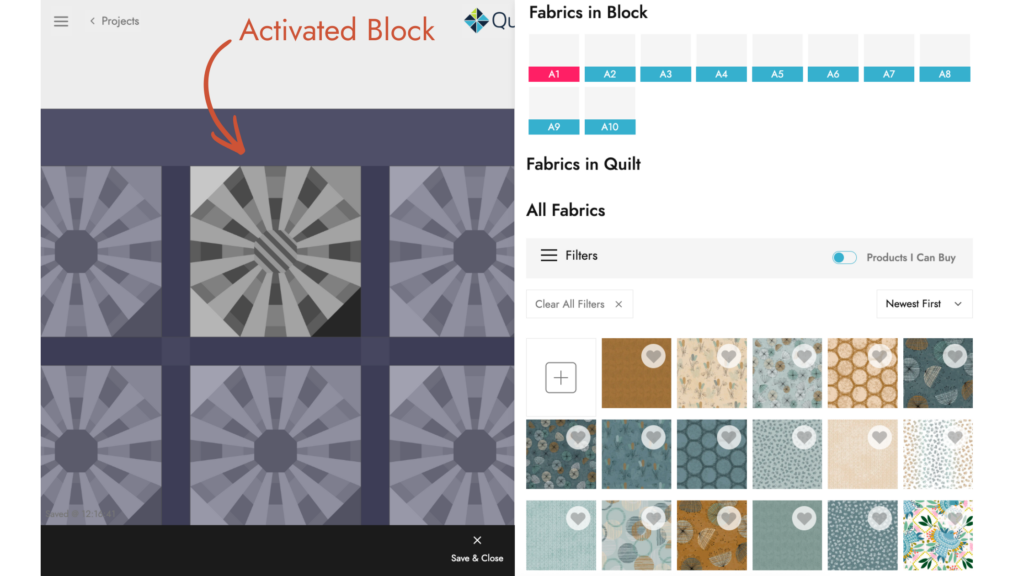
The Project Side
On the pattern side, you will see the block we activated in the previous step. Your chosen block is in the forefront with the rest of our quilt faded into the background.
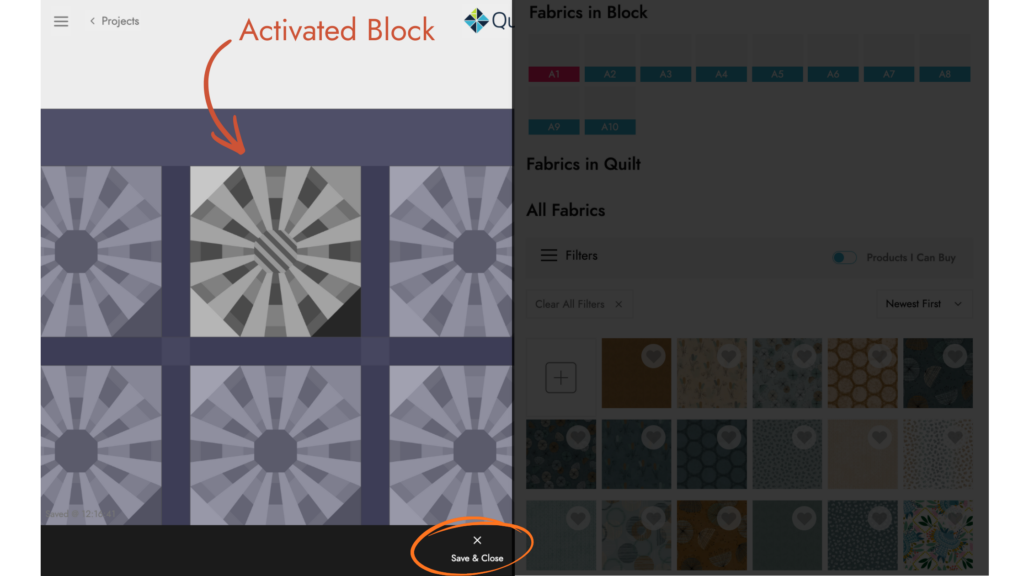
Also, at the bottom center, there is a Save & Close button. This is the button we will click before exiting this page. Clicking this button saves everything you’ve done in the Block Editor and takes you back to the main Quilt Planner page.
The Fabric Panel Side
On the right side, you’ll see the fabric panel which houses the Quiltster fabric stash and all the tools you’ll need to start adding fabric to your quilt.

Fabrics in Block
This section shows the fabrics used in the currently open block. The active color group is highlighted in pink so you can easily see which space you’re working on. The fabric IDs shown here match the fabric IDs in your pattern instructions. This panel updates each time you switch to a different block.
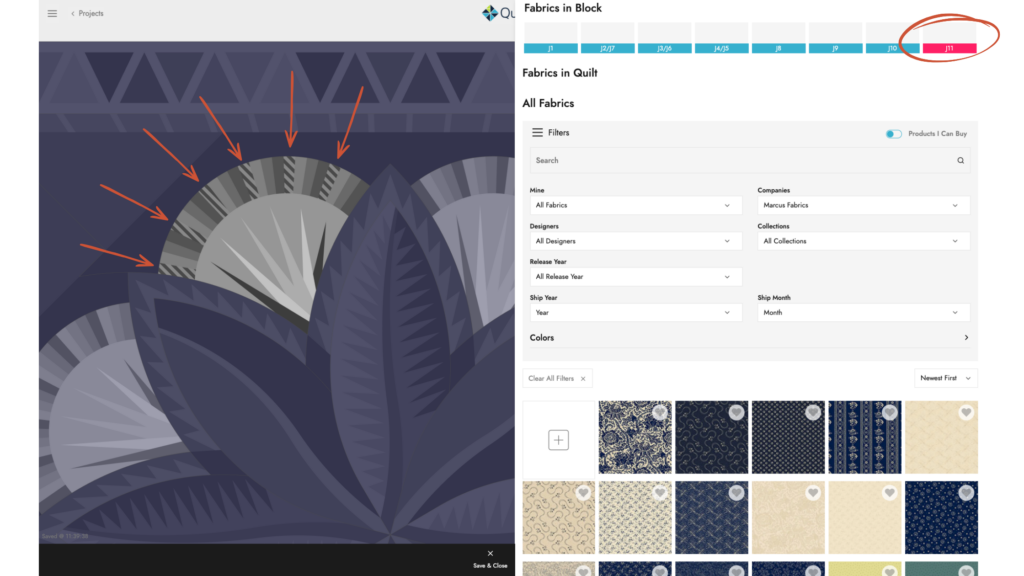
Pro Tip: Click the ID in Fabrics in Block to activate its color group without using the block preview. It’s a fast way to jump between sections and especially helpful for identifying small pieces in your quilt.
Fabrics in Quilt
This is a running list of every fabric used in your project so far. It updates automatically as you add fabrics, making it easy to reuse the same fabrics across blocks and keep your quilt consistent. This panel stays in place and continues to update as you edit each block.
All Fabric (Filters)
This section displays the full Quiltster fabric stash. Use the filters to narrow down your options and quickly find fabrics you love.
A few helpful tips:
- Filters stack: If you select a Company, the Designer and Collection filters will automatically adjust to show only options from that company.
- Clear All Filters: Resets the entire filter panel. If you use this button, you’ll need to turn the Products I Can Buy toggle back on afterward.
Filter Options
Products I Can Buy: Toggle ON to show fabrics that are available for purchase on Quiltster.com, making it easy to buy everything in your project when you’re finished.
Search field: Search by full or partial fabric SKU. You can also type keywords like Christmas to display collections or fabrics containing that term.
Mine > My Fabrics: Shows fabrics you have personally uploaded to Quiltster.
Mine > My Favorites: Shows fabrics from Quiltster’s stash that you’ve favorited by clicking the heart icon.
Companies: Filter by Fabric Company.
Designers: Filter by Fabric Designer.
Collections: Filter by Collection.
Release Year: Primarily used by quilt shops that have access to pre-release collections. Most quilters will find Ship Year more helpful.
Ship Year: The year the collection shipped to quilt shops and became available to consumers.
Ship Month: The month the collection shipped to quilt shops and became available to consumers.
Colors: A color chart that helps you find fabrics in similar color families.
Clear All Filters: Resets the entire fabric filter.
How to Add Fabric to Your Project
Choose a Space in Your Block
Click a section of the block to activate it. The selected space will display a striped overlay, indicating it’s ready for fabric.
The activated space (or spaces) are called a Color Group.
What Is a Color Group?
A color group is a set of one or more shapes in a block that are permanently linked together and will always use the same fabric.
When you click a section of the block:
- One or more spaces may activate at the same time
- The activated areas show a striped overlay
- All highlighted areas together = one color group
Color groups are:
- Defined by the pattern designer
- Stationary (they cannot be split apart)
- Used to ensure accurate yardage calculations
- Designed so those pieces are always cut from the same fabric
This means when you apply fabric to that group, all linked pieces update together automatically.
Choose & Add Your First Fabric
Now for the fun part ✨
- Use the fabric filters under All Fabrics to find a fabric you’d like to use.
- To add fabric, simply click on the swatch and watch it load instantly into your project.
- Repeat these steps until fabric has been assigned to every space.
When you’re happy with your fabric choices for this block group: Click Close & Save
This returns you to the main Quilt Planner page, where you can preview your fabric selections and see how they look in the quilt as a whole.
A few tips:
- Don’t miss any spaces! Double-check the Fabrics in Block section to confirm every color group has fabric assigned. This is especially helpful when working with tiny pieces like flying geese or narrow border strips.
- Want to try a different fabric? Just click another swatch and it will replace the previous one.
- Experiment as much as you like! You can change fabrics anytime.
Complete Your Project
Continue working through each block group until your quilt is fully colored.
Repeat the process:
From the main Quilt Planner page
- Select a block group
- Click Edit
Inside the Block Editor
- Select a color group
- Click a fabric swatch to apply it
- Repeat until the block is complete
- Click Save & Close to return to the Quilt Planner
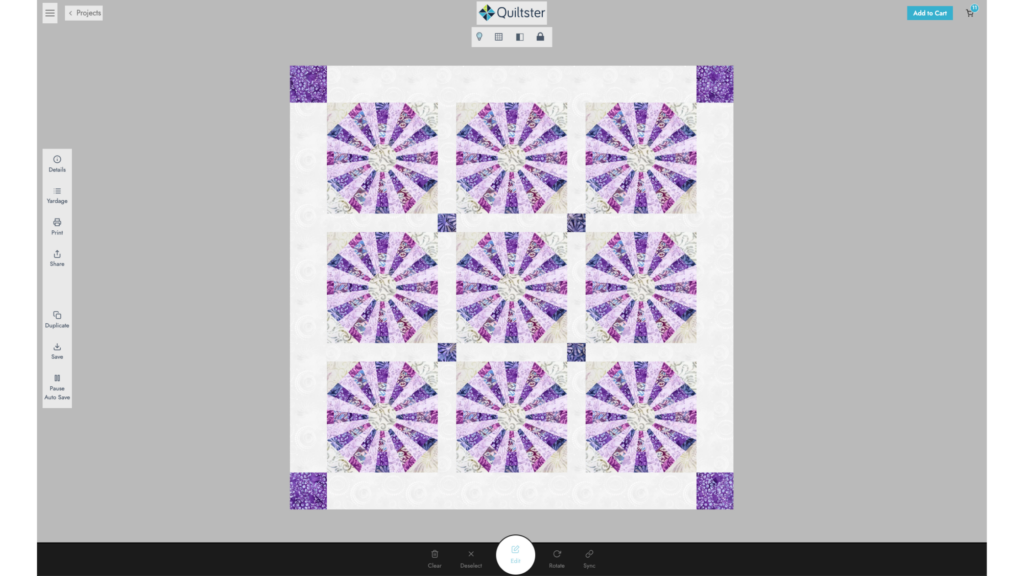
Back on the Quilt Planner page
- Review your quilt as a whole
- Decide if you love it or if you want to make any changes
Pro Tip: Create a duplicate of your project at any stage to save your current version and try a few variations to compare side-by-side.
Add Backing & Binding (Optional Final Step)
If you’d like to include backing and binding in your project yardage, click the Yardage button on the left side menu of the Quilt Planner page. From there, you can enter backing and binding amounts, which will appear at the bottom of your yardage chart.

Want to Learn More About Working with Fabric?
If you’d like to explore more ways to work with fabric in Quiltster including how to upload your own fabrics, organize your stash, and build a library of go-to prints check out our Build Your Dream Stash series.
Check it out here: Build Your Dream Stash
What’s Next?
Continue with the final step in the My First Quiltster Project series:
- Choose a Pattern
- Choose a Template
- Identify & Activate Blocks
- Add Fabric
- Save Project ← Up next
Bonus Step: How to Share Your Project