Once you’ve chosen your pattern and clicked Create Project on the pattern detail page, Quiltster will show you the available template options for that pattern. This is where you’ll choose the template that will become your working quilt inside the Quilt Planner.
This post explains the different templates you’ll see and how to choose the right one for your project.
My First Quiltster Project
This is step 2 of 5 in learning how to create a project in Quiltster. Follow along the entire My First Quiltster Project series and watch your dream quilt come to life.
- Choose a Pattern
- Choose a Template ← You are here
- Activate Your Pattern for Editing
- Add Fabric
- Save Project
Bonus Step: How to Share Your Project
Quick Start Steps
If you just want the short version, here it is:
- In the Template Options window, click Create Project next to the template you want to use
- Enter a name for your project
- Click Create Project again to open your project in the Quilt Planner
For a detailed step-by-step guide, continue with the instructions below.
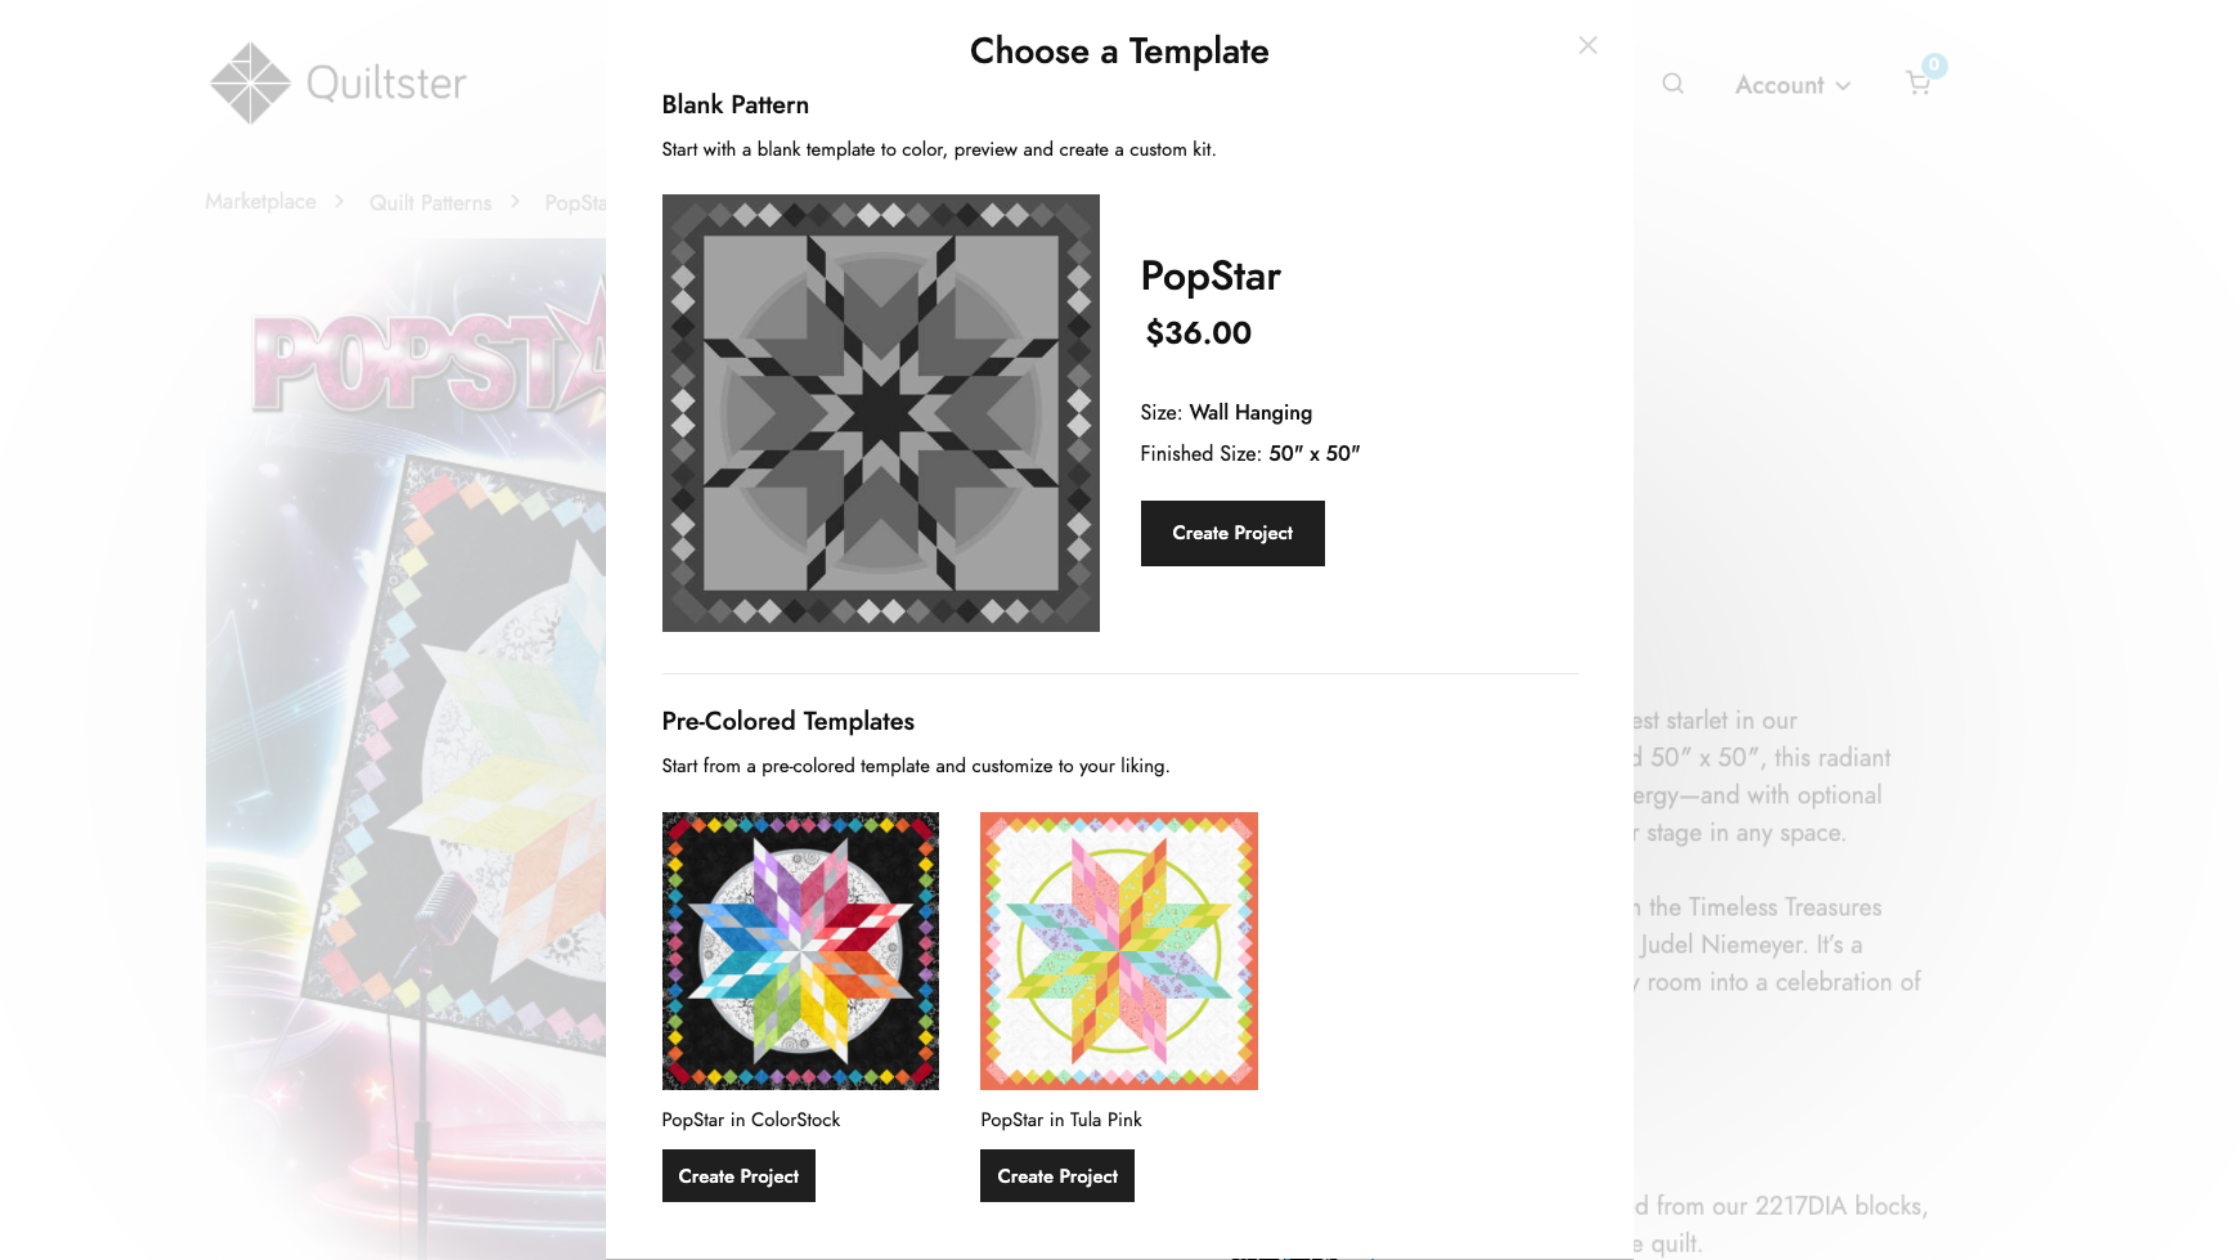
What are Templates in Quiltster?
A template is a predesigned digital version of a quilt pattern that’s ready to use inside the Quilt Planner. It includes the predetermined line design and block placement based on the designer’s original structure.
All standard patterns in Quiltster include at least one template option so you can immediately begin planning your quilt.
After selecting your pattern, Quiltster guides you to the template options step, where you’ll choose one to use as a base for your project.

Blank Templates
Every pattern in Quiltster includes at least one blank template shown in greyscale. Think of this as your ready-to-color version of the quilt. It has the full block layout and design already in place, just waiting for your fabric choices.
The light and dark shading you see is there to help guide you as you pick fabrics. It suggests where lighter and darker values were used in the original design so it’s easier to balance your colors, especially if you’re new to quilt planning.
It’s a helpful guide, not a rule. You can follow it closely or go your own way. Your fabric choices are always up to you.
Mixer Pattern Templates
Note: Mixer patterns use templates differently and allow you to mix and match from predesigned block options. We cover Mixer patterns in a separate tutorial.
Pre-Colored Templates
Some patterns also include one or more pre-colored templates. These are ready-to-use versions where fabric has already been applied to the quilt design. They often reflect the pattern’s cover quilt or a popular color version you may have seen before.
Pre-colored templates are a great starting point if you’d rather not begin with a blank layout. Instead of building your color plan from scratch, you can start with an existing color story and adjust it to fit your taste or your fabric stash.
They’re especially helpful when you want to:
- Start with an established color layout
- Swap in fabrics you already own
- Replace prints with similar purchasable fabrics in Quiltster
- Experiment with new fabric options while keeping the same color balance
And don’t worry, nothing is locked. You can replace any fabric in a pre-colored template with your own choices at any time.


How to Choose Your Template
Now that you understand the different template options, you’re ready to choose the one you want to use as the starting point for your project.
To select your template:
- Click Create Project next to the template you want to use.

2. Enter a project name. Adding a description is optional and is only for your reference.
3. Click Create Project again.

You’ll be taken straight into the Quilt Planner, where you can begin adding fabric and exploring color.
We’ll walk through the Quilt Planner workspace in the next tutorial, starting with how to identify and activate your blocks.
What's Next?
Continue with the next step in the My First Quiltster Project series:
- Choose a Pattern
- Choose a Template
- Activate Your Pattern for Editing ← Up next
- Add Fabric
- Save Project
Bonus Step: How to Share Your Project